You don’t have to look far to find free MP3 ringtones on the Internet. They’re pretty much everywhere — including here on Beepzoid.
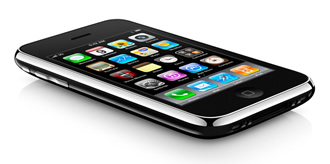
The problem for iPhone owners is, how do you convert them for your iPhone? iTunes can convert them for you, though the process is a bit confusing unless you have step-by-step instructions.
Here are 10 steps you can use to convert a standard MP3 ringtone into an AAC-based ringtone that’s compatible with your iPhone.
1. In iTunes, choose “Add File to Library” from the “File” pull-down menu.
2. Browse to the file you want to convert. Select it and open it.
3. Click on the newly created icon for the file to select it. You should find the icon in the Albums view of the Music Library, most likely labeled as “Unknown Album, Unknown Artist.” Once selected, the icon will have a blue border.
4. Choose “Create AAC Version” from the “Advanced” pull-down menu.
5. You can now delete the two new icons that were created for the Albums view — you won’t need them anymore. To delete an icon, right click it and select “Delete” from the menu options.
6. Now you’ll need to find the converted file in order to rename it. On my PC, the file is saved along this folder path: My Documents/My Music/iTunes/iTunes Music/Unknown Artist/Unknown Album.
7. Change the extension of the converted file from .m4a to .m4r.
8. Back in iTunes, select the Ringtones Library. Then choose “Add File to Library” from the “File” pull-down menu.
9. Browse for the renamed .m4r file. Select it and open it.
10. Your converted MP3-format ringtone should now be available as an M4R-format ringtone for your iPhone.
That’s the method I used to convert MP3 ringtones to iPhone ringtones for Beepzoid’s Vintage Phone Ringtones page. I can’t guarantee this process will work for you, but it has yielded consistent results for me with minimal fuss.
